
If you’ve avoided trimming your dog’s nails because you’re worried you’ll hurt them, you’re not alone. Most new owners feel that fear. The good news: this is a learnable skill, and millions of people do it safely at home. The better news: you don’t have to be perfect at it to get it right.
Long nails aren’t just uncomfortable—they alter your dog’s gait in ways that compound over time. When nails grow too long, they change the digit extension angle by 10–15 degrees, which shifts weight distribution forward onto the toes rather than the pads. That altered angle increases chronic tension in the carpal joints (front legs) and tarsal joints (rear legs), raising arthritis risk over years of walking with improper biomechanics. According to the American Veterinary Medical Association, nail overgrowth is one of the most preventable orthopedic issues in dogs. Learning to trim at home saves money, reduces grooming-related anxiety for dogs who hate car rides or strange places, and gives you more control over your dog’s routine care. But it does require patience in the learning phase, and it’s not the right fit for every dog or every owner.
Most dogs need their nails trimmed every 4–6 weeks. Active dogs—those hiking, running on trails, or doing regular pavement walks—often need trims every 3–4 weeks because ground friction alone doesn’t wear nails fast enough to prevent overgrowth. Sedentary dogs or those who walk mostly on grass may stretch to 6–8 weeks between sessions. If you hear clicking on hard floors, it’s past time.
What you’ll need
Tools:
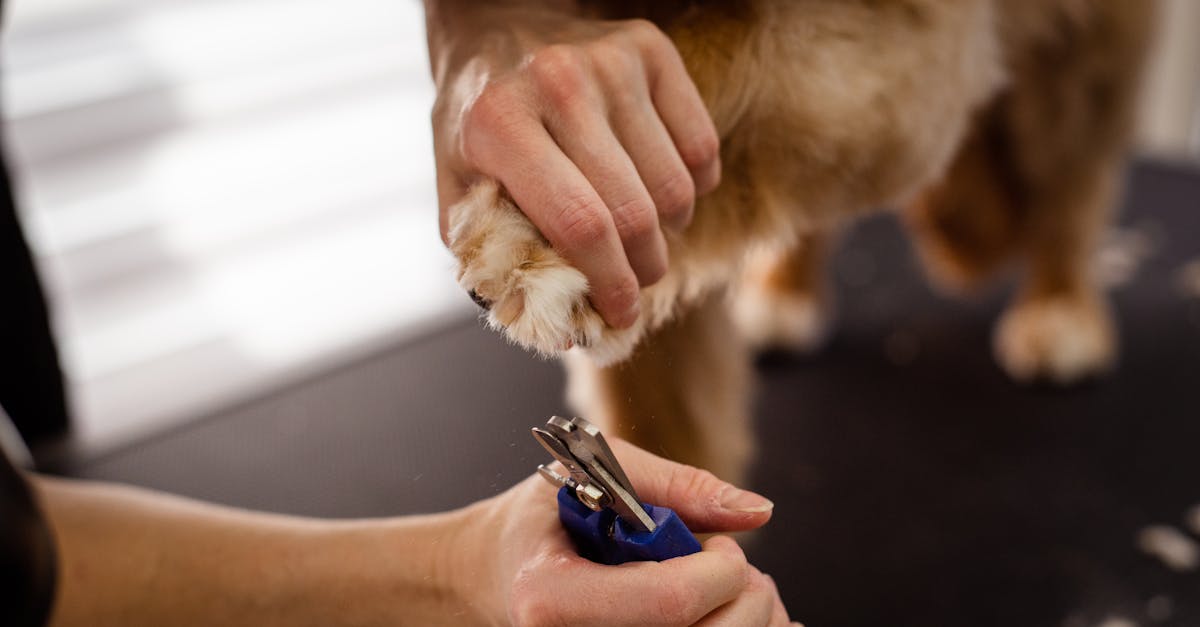
- Sharp nail clippers (scissor-style or guillotine-style) or a nail grinder
- Styptic powder or pencil (Kwik Stop is the common brand; cornstarch works in a pinch)
- Good lighting (desk lamp or headlamp)
- Non-slip mat or towel
Clippers vs. grinder: which to choose
Clippers are faster and work well when you can see the quick clearly (light-colored nails). They require one clean cut per nail but carry higher risk if you misjudge where the quick starts.
Grinders are safer for dark-nailed dogs because you remove tiny amounts at a time—no guessing where the quick is. They also reduce panic in dogs who tolerate noise and vibration better than the pressure of clippers. The tradeoff: grinders require more hand strength, longer tool-contact time per nail, and some dogs hate the sound. If your dog is noise-sensitive or you have grip-strength limitations, clippers may be the better fit.
Materials:
- High-value treats (something your dog doesn’t get any other time)
- Towel for cleanup
Prerequisites:
- A dog who tolerates having their paws handled. If they pull away or snap, work on desensitization first before attempting trimming.
- Basic understanding of where the “quick” is—the blood vessel inside the nail
Before you start
Safety first: If you cut into the quick—the pink center of the nail that contains blood vessels and nerves—your dog will bleed and it will hurt. It’s not a medical emergency, but it’s stressful for both of you. Have styptic powder on hand before you begin. If bleeding doesn’t stop after five minutes of pressure and styptic powder, call your vet.
Do not force a panicked or aggressive dog into nail trimming. If your dog is struggling, yelping before you even cut, or showing signs of aggression, stop immediately. Restraint injuries and behavioral escalation are real risks. Work with a certified trainer on desensitization, or switch to professional grooming.
Check for underlying issues: If your dog’s nails are unusually soft, brittle, discolored, or smell off, don’t trim them. These signs can indicate liver disease, fungal infection, or other systemic problems. Consult your vet first.
Step 1: Set up your workspace
Choose a non-slip surface—a grooming table, bathtub with a towel, or even the floor if your dog is calm there. You want bright, direct light so you can see the nail clearly. Position yourself so the nail is at eye level when you lift the paw.
If your dog is anxious, start with short positive association sessions days before you actually trim. Let them sniff the clippers, give treats, put the clippers away. Repeat until the sight of the tool doesn’t cause tension.
Step 2: Restrain gently and lift the paw
You need control without force. If you’re working alone, loop a leash around a table leg to keep your dog in place, or have them lie on their side. If you have a helper, they can steady the dog’s body while you work.
Lift the paw and push down gently on the pad to extend the nails fully. The nail should protrude clearly from the fur and pad. If your dog pulls back, pause. Reward them for holding still, even if it’s just for two seconds.
Step 3: Identify the quick
In light-colored nails, the quick is the pink center. Stop trimming about ¼ inch before where the pink starts.
In dark nails, this is harder. Look at the underside of the nail. As you trim small slivers off the tip, you’ll eventually see a dark center spot appear—that’s the beginning of the quick. Stop there.
When in doubt, trim less. You can always take more off in a few days. Frequent small trims are safer than one aggressive cut.
Step 4: Clip at a slight angle
Hold the clippers at a slight angle—about 45 degrees—rather than straight across. This matches the natural shape of the nail and reduces the chance of splitting.
For scissor-style clippers, position the blade facing you. For guillotine-style, insert the nail through the opening and position the blade where you want to cut.
Make one clean cut. Don’t squeeze halfway and readjust—that crushes the nail and makes it more painful.
Step 5: If you see blood, apply styptic powder immediately
If you hit the quick, your dog will likely yelp and pull back. Stay calm. Dip the nail into styptic powder or press the powder directly onto the cut end. Hold pressure for 30 seconds. The bleeding should stop.
Cornstarch or flour works if you don’t have styptic powder. Avoid hydrogen peroxide—it delays clotting.
If bleeding doesn’t stop after five minutes of pressure, call your vet.
Step 6: Trim all nails, including dewclaws
Most dogs have four nails per paw, plus dewclaws on the front legs (and sometimes the back). Dewclaws don’t touch the ground, so they grow faster and curl into the pad if neglected.
Rear nails are often shorter than front nails because dogs push off with their back legs. You may not need to trim them as often.
Reward your dog after every few nails, not just at the end. This keeps the experience positive even if they’re tolerating it rather than enjoying it.
Step 7: Check your work

Look at each nail from the side. The tip should be just above the floor when your dog is standing. If nails click on hard floors, they’re too long.
Run your hand over the cut ends. They should feel smooth, not sharp or splintered. If you see rough edges, smooth them with a nail file or grinder.
Verify it worked
Stand your dog on a flat surface. Their nails should not touch the ground. If they do, take off a bit more next time—or book a professional groomer appointment if you’re not confident doing another round.
Watch your dog walk. They should move normally, without favoring any paw or limping. If they seem uncomfortable after a trim, check for cuts or splits you may have missed.
Troubleshooting
Problem: My dog won’t let me touch their paws.
Work on desensitization before you try trimming. Touch the paw, reward. Hold the paw, reward. Touch a nail with the clipper (not cutting), reward. This can take days or weeks. If your dog has a pain history with their paws—old injury or arthritis—consult your vet before proceeding further.
Problem: I can’t see the quick in dark nails.
Use a flashlight behind the nail; sometimes you can see a faint shadow. Or switch to a grinder, which removes tiny amounts at a time and gives you more control. The “two-dot method” helps: as you trim, look at the cross-section. When you see a dark oval or two small dots appear in the center, you’re close to the quick. Stop there.
Problem: My dog is fine with front paws but hates having back paws touched.
This is common. Rear paws are more sensitive and harder for dogs to see, so it feels more threatening. Go slower. Do one rear nail per session if that’s what it takes. Some dogs never get comfortable with rear paw handling—professional grooming is a valid choice.
Problem: The nail split or cracked when I cut it.
Your clippers are dull. Replace them. Dull blades crush instead of cutting cleanly, which causes splits and makes the experience more painful. Replace clippers every 6–12 months depending on use.
When to see a vet or groomer
See a vet before trimming if:
- Your dog has never had their nails trimmed and you’re anxious about learning the technique. A vet can demonstrate in person.
- The nails are discolored, smell bad, or seem unusually thick or soft
- Your dog shows signs of paw pain—limping, licking, swelling—when nails are normal length
- Your dog has arthritis or mobility issues that make positioning painful
See a vet after trimming if:
- Bleeding doesn’t stop after five minutes of styptic powder and pressure
- A paw becomes swollen, hot, or infected-looking within 24–48 hours
- Your dog suddenly refuses to walk or shows lameness after the trim
Consider a groomer instead if:
- You’ve tried this multiple times and it’s stressful for both of you
- Your dog has severe anxiety or aggression around paw handling
- You don’t have time to desensitize and your dog’s nails are already overgrown
Many owners find that paying for professional grooming every 4–6 weeks is less stressful than learning this skill themselves. That’s a completely valid choice. The point is to keep your dog’s nails at a healthy length, not to prove you can do it yourself.
FAQ
How short should my dog’s nails be?
Short enough that they don’t touch the ground when your dog is standing. If you hear clicking on hard floors, they’re too long. Frequent small trims encourage the quick to recede over time, keeping nails naturally shorter.
What if my dog hates nail trimming?
Start with desensitization. Touch the paw, reward. Hold a paw, reward. Touch the clippers to a nail without cutting, reward. Some dogs never love it, but you can make it tolerable. If your dog escalates to aggression or panic, work with a certified trainer or switch to professional grooming.
Can I use human nail clippers on my dog?
Not recommended. Dog nails are thicker and shaped differently. Human clippers crush rather than cut cleanly, which causes splitting and pain. Dog clippers cost $10–$20 and last for months.
How do I know if I hit the quick?
You’ll see blood, and your dog will react—usually a yelp or pulling the paw back sharply. Apply styptic powder immediately. If you’re trimming gradually and checking the cross-section as you go, you’ll see a dark center spot or oval appear before you hit the quick. Stop there.
How often do I need to trim my dog’s nails?
Most dogs need trimming every 4–6 weeks. Active dogs who hike, run, or walk regularly on pavement need trims every 3–4 weeks because ground friction doesn’t wear nails down fast enough to prevent overgrowth. Sedentary dogs or those who mostly walk on grass can stretch to 6–8 weeks between sessions. The ASPCA recommends checking nail length weekly and trimming when you hear clicking on hard floors.
Trimming your dog’s nails at home isn’t about being perfect. It’s about being careful, staying calm when you make a mistake, and knowing when to stop and call in help. If you get through a session without bleeding and your dog tolerates it, that’s a success. If you realize halfway through that this isn’t for you, booking a groomer is also a success. The goal is healthy nails and a dog who isn’t dreading the next round.